
There’s something magical about combining the worlds of baking and tea drinking. When you bite into an Earl Grey cookie, you’re experiencing more than just a sweet treat – you’re tasting tradition, sophistication, and comfort all rolled into one delightful package.
I discovered these cookies during a particularly dreary winter afternoon when I was craving something warm and comforting but wanted to try something different from my usual chocolate chip routine. The idea of infusing cookies with the distinctive bergamot flavor of Earl Grey tea seemed both adventurous and cozy at the same time.
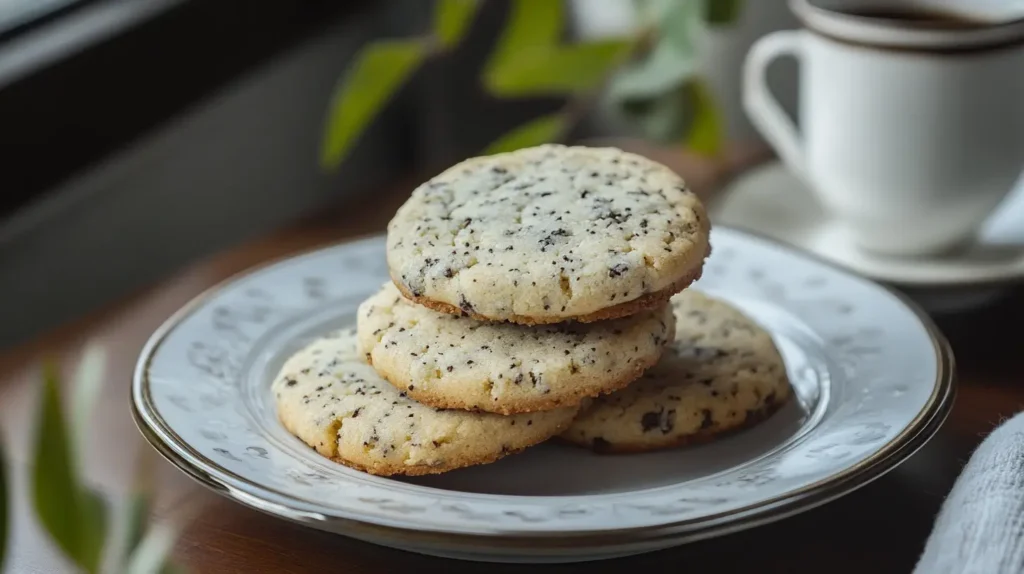
Table of Contents
What Makes Earl Grey Cookies Special
These aren’t your typical cookies. While most cookies rely on familiar flavors like vanilla, chocolate, or cinnamon, Earl Grey cookies bring something unexpected to the table. The bergamot oil that gives Earl Grey tea its characteristic taste creates a subtle citrusy-floral note that transforms simple butter cookies into something memorable.
Choosing Your Tea: The Foundation of Flavor
Not all Earl Grey teas work equally well for baking. I’ve experimented with various brands and styles, and here’s what I’ve learned:
Loose-leaf vs. Tea Bags: Loose-leaf tea generally provides more robust flavor, but don’t overlook quality tea bags. They’re convenient for baking since you can easily measure the contents and grind them finely.
Quality Matters: Look for teas that use real bergamot oil rather than artificial flavoring. The difference is noticeable – real bergamot creates a more complex, nuanced flavor that artificial versions simply can’t match.
Freshness Counts: Old tea loses its potency. If your Earl Grey has been sitting in the pantry for years, it probably won’t deliver the flavor punch you’re hoping for in your cookies.
Some bakers swear by Lady Grey (Earl Grey’s more delicate cousin with cornflower petals and extra citrus peel) or Earl Grey with lavender. Feel free to experiment – baking should be fun, after all.
The Science Behind Perfect Earl Grey Cookies
Understanding why certain techniques work helps you become a better baker. When we grind the tea leaves into a fine powder, we’re maximizing surface area contact with the other ingredients. This ensures even distribution and prevents those unpleasant surprises of biting into a chunk of tea leaf.
The creaming process – beating butter and sugar until light and fluffy – isn’t just about mixing ingredients. It’s about incorporating air into the mixture, which creates the tender, melt-in-your-mouth texture that makes these cookies so appealing.
Chilling the dough serves multiple purposes. It allows the tea flavors to develop and meld with the other ingredients, prevents the cookies from spreading too much during baking, and makes the dough easier to handle.
My Go-To Earl Grey Cookie Recipe
After countless batches and minor adjustments, this recipe consistently produces cookies with the perfect balance of tea flavor and buttery goodness.
What You’ll Need:
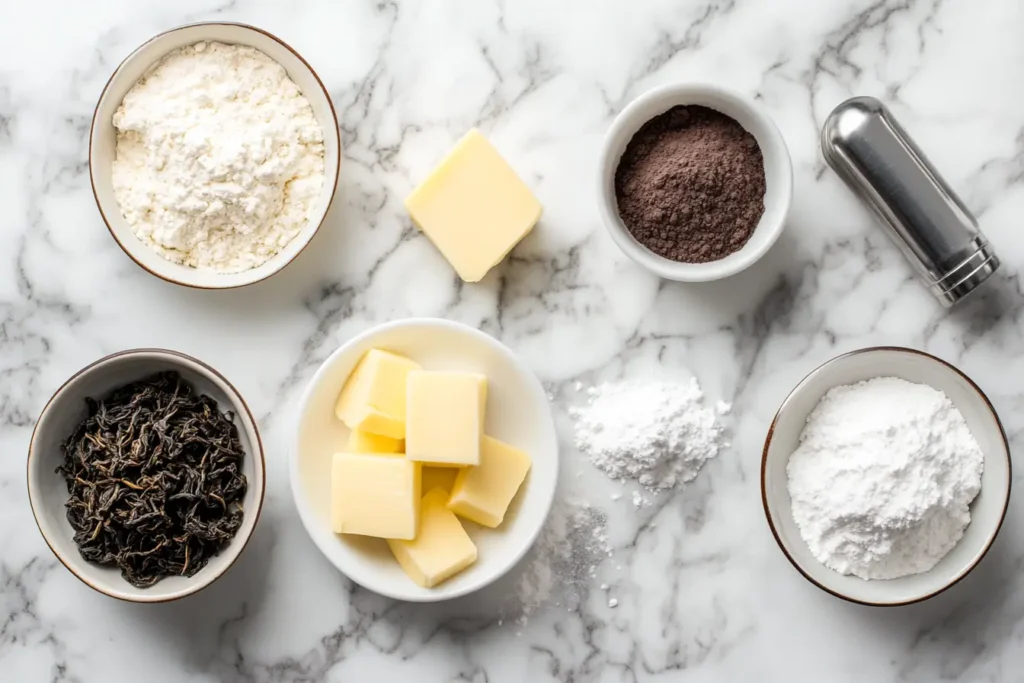
- 2 cups all-purpose flour
- 3 tablespoons Earl Grey tea (finely ground)
- 1 cup butter, softened
- ¾ cup granulated sugar
- ¼ cup powdered sugar
- 1 teaspoon vanilla extract
- ½ teaspoon salt
The Process:
Start by grinding your tea leaves until they’re fine and powdery. A coffee grinder works perfectly for this, but a food processor will do the job too. You want to avoid any large pieces that might create an unpleasant texture.
Heat your oven to 350°F and line your baking sheets with parchment paper. This prevents sticking and makes cleanup much easier.
In a large bowl, cream the softened butter with both sugars. This takes about 3-4 minutes with an electric mixer. The mixture should look light and fluffy, almost like frosting. Add the vanilla and mix until combined.
In a separate bowl, whisk together the flour, ground tea, and salt. Gradually add this to the butter mixture, mixing just until everything comes together. Don’t overmix – this can make the cookies tough.
Shape the dough into a log, wrap it in plastic wrap, and refrigerate for at least 30 minutes. This step is crucial for both flavor development and preventing the cookies from spreading too much.
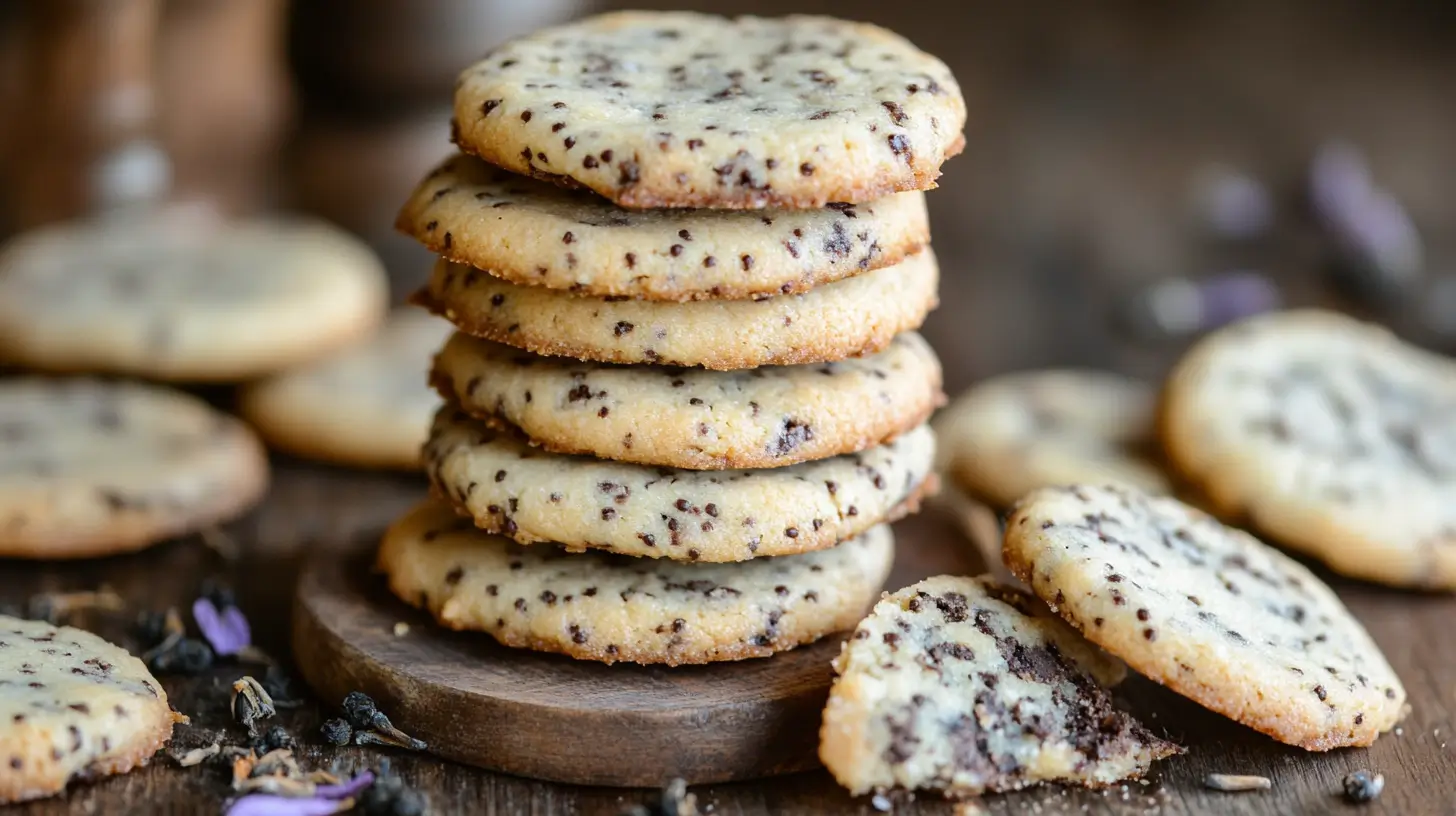
Slice the chilled dough into rounds about ¼-inch thick. Place them on your prepared baking sheets with some space between each cookie – they’ll spread slightly as they bake.
Bake for 12-15 minutes, watching for the edges to turn lightly golden. The centers might look slightly underdone, but they’ll continue cooking on the hot pan after you remove them from the oven.
Let the cookies cool on the baking sheet for about 5 minutes before transferring them to a wire rack. This prevents them from breaking while ensuring they set properly.
Troubleshooting Common Issues
Cookies turning out too dry? This usually happens when there’s too much flour or not enough moisture. Try adding a tablespoon of milk to the dough, or make sure you’re not packing the flour when measuring.
Tea flavor too strong? Earl Grey can be intense when concentrated in cookies. Next time, use slightly less ground tea. Remember, you can always add more, but you can’t take it away.
Cookies spreading too much? Make sure your butter isn’t too soft when you start mixing, and don’t skip the chilling step. Room temperature butter should give slightly when pressed but not be melty.
Weak tea flavor? Try steeping the tea in melted butter for about 10 minutes, then straining out the leaves and using the infused butter in your recipe. Just let it cool and solidify first.
Creative Variations to Try
Once you’ve mastered the basic recipe, these variations can add interesting twists:
Lemon Earl Grey: Add the zest of one lemon to complement the bergamot’s citrus notes. It brightens the entire cookie and adds a fresh dimension.
Chocolate Earl Grey: Fold in about ½ cup of dark chocolate chips. The slight bitterness of dark chocolate plays beautifully with the tea’s complexity.
Lavender Earl Grey: Add ½ teaspoon of dried culinary lavender for an extra floral note. Use sparingly – lavender can quickly overpower other flavors.
Glazed Earl Grey: Make a simple glaze with powdered sugar and strongly brewed (then cooled) Earl Grey tea. Drizzle over cooled cookies for an elegant finish.
Storage Tips That Actually Work
Fresh-baked cookies are wonderful, but properly stored cookies can taste almost as good days later. Store cooled cookies in an airtight container at room temperature. They’ll stay fresh for up to a week.
For longer storage, these cookies freeze beautifully. Layer them in freezer-safe containers with parchment paper between layers. They’ll keep for up to three months frozen. Just thaw at room temperature for 20-30 minutes before serving.
Here’s a pro tip: freeze the dough instead of the baked cookies. Shape it into logs, wrap tightly, and freeze. When you want fresh cookies, just slice and bake from frozen – add a couple extra minutes to the baking time.
Perfect Pairings and Serving Ideas
Obviously, these cookies pair wonderfully with Earl Grey tea, but don’t limit yourself. They’re delicious with coffee, especially lighter roasts that won’t compete with the delicate tea flavor.
For entertaining, arrange them on a nice platter with some fresh berries and perhaps a small bowl of clotted cream or mascarpone for dipping. The combination of the cookies‘ subtle complexity with the richness of cream is heavenly.
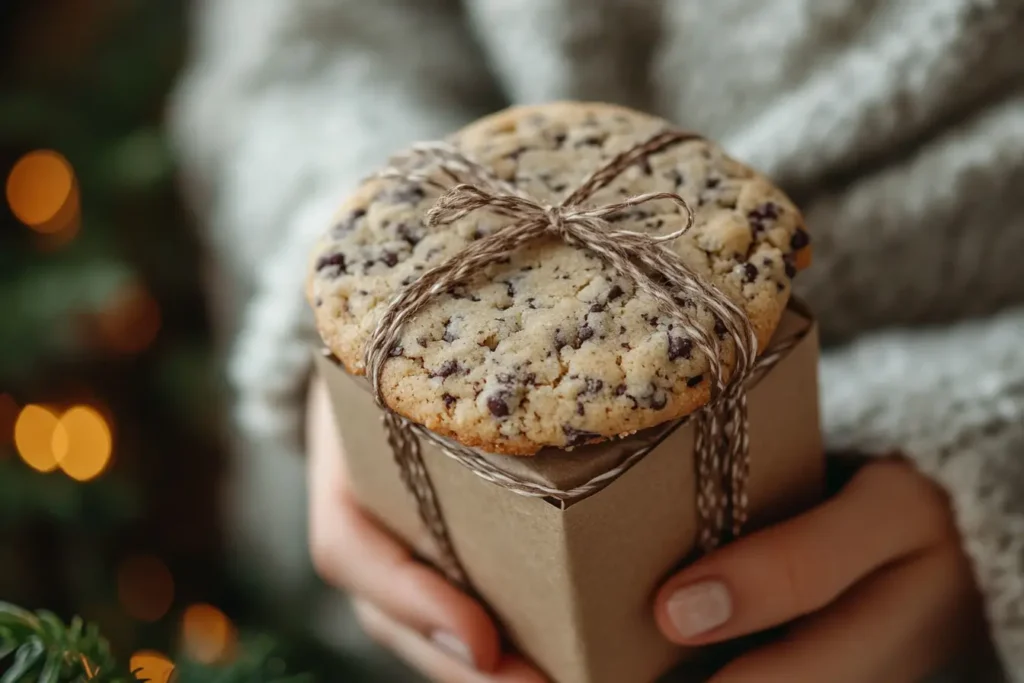
They also make exceptional gifts. Package them in clear jars tied with ribbons, or create themed gift boxes with Earl Grey tea and pretty teacups. The unique flavor makes them memorable gifts that people actually appreciate.
Earl Grey Cookies
Ingredients
Ingredients
- 1 cup unsalted butter softened
- 1 cup granulated sugar
- 2.5 cups all-purpose flour
- 2 tablespoons Earl Grey tea leaves finely ground
- 1 teaspoon vanilla extract
- 0.5 teaspoon salt
Instructions
- Preheat your oven to 350°F (175°C) and line a baking sheet with parchment paper.
- In a bowl, cream together the softened butter and granulated sugar until light and fluffy.
- Add the finely ground Earl Grey tea leaves, vanilla extract, and salt to the butter mixture, mixing well to combine.
- Gradually add the all-purpose flour, mixing until the dough comes together.
- Roll the dough into a log shape, wrap it in plastic wrap, and refrigerate for at least 30 minutes.
- Once chilled, slice the dough into 1/4-inch thick rounds and place them on the prepared baking sheet.
- Bake for 12-15 minutes, or until the edges are lightly golden.
- Allow the cookies to cool on the baking sheet for a few minutes before transferring them to a wire rack to cool completely.
Notes
Frequently Asked Questions (FAQs)
Can I Use Decaf Earl Grey Tea for Cookies?
Absolutely! If you prefer to avoid caffeine, decaf Earl Grey tea works just as well. The flavor is nearly identical, so you won’t miss out on the signature taste.
How Long Do Earl Grey tea cookies Stay Fresh?
Stored properly in an airtight container, Earl Grey cookies will stay fresh for up to 1 week at room temperature or up to 3 months in the freezer.
Can I Make Earl Grey Cookies Without Eggs?
Yes! Most Earl Grey cookie recipes are egg-free, as they rely on butter and flour for their texture. If a recipe calls for eggs, you can use substitutes like applesauce or flax eggs for a vegan option.
Why These Cookies Matter
In a world full of ordinary cookies, Earl Grey cookies stand out because they represent something more thoughtful. They show that you’ve taken the time to create something special, something that reflects care and creativity.
They’re also incredibly versatile. Casual enough for everyday snacking, elegant enough for special occasions, and interesting enough to be conversation starters. They bridge the gap between comfort food and sophisticated treats.
The next time you want to bake something that will genuinely surprise and delight people, consider these Earl Grey cookies. They’re proof that sometimes the best treats come from unexpected combinations and that a little creativity in the kitchen can lead to truly memorable results.
Whether you’re a seasoned baker or just starting out, these cookies offer the perfect balance of simplicity and sophistication. They’re forgiving enough for beginners yet refined enough to impress experienced bakers. Most importantly, they’re delicious – and isn’t that what baking is really all about?